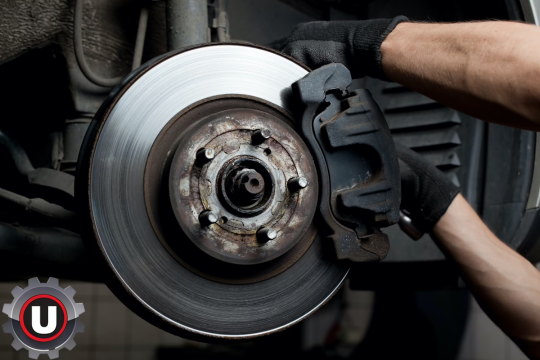
Brake pads are the unsung heroes of your vehicle's braking system. Responsible for creating the friction that halts your vehicle, these pads endure heat and pressure every time you press the brake pedal. At Universal Auto Spares, we know the importance of maintaining effective and responsive brakes, and changing your brake pads is a maintenance job that many car enthusiasts can undertake with a bit of guidance and the right tools. This comprehensive guide will lead you through each step of changing your brake pads, ensuring you can do the job safely and correctly.
When to Change Your Brake Pads
First, it's critical to know when your brake pads need changing. Most manufacturers suggest replacing brake pads every 50,000 miles, but this varies based on your driving style and conditions. Warning signs include a squealing noise when braking, longer stopping distances, or if the brake pedal feels different when you press it.
What You'll Need
- New brake pads (get the right type for your vehicle from Universal Auto Spares)
- Car jack and jack stands
- Lug wrench
- C-clamp or brake caliper tool
- Wrench set
- High-temperature lubricant
- Safety gloves and goggles
Step-by-Step Guide to Changing Your Brake Pads
Step 1: Safety First
Ensure your car is on a flat surface, engage the parking brake, and put wheel chocks behind the wheels for extra safety. Wear safety gloves and goggles to protect yourself.
Step 2: Loosen the Lug Nuts
Before jacking up the vehicle, loosen the lug nuts on the wheels (do not remove them completely) with the lug wrench.
Step 3: Jack Up the Car
Use the car jack to lift the vehicle, then securely place the jack stands under the car to support it.
Step 4: Remove the Wheels
Now remove the lug nuts and wheels to reveal the brake caliper, which houses the brake pads.
Step 5: Remove the Brake Caliper
Using the appropriate wrench, remove the bolts holding the caliper. Once loose, remove the caliper carefully without putting strain on the brake hose. You can support it with a wire hanger or tie it up against the suspension.
Step 6: Remove Old Brake Pads
With the caliper removed, the brake pads should be easily accessible. They may either clip out or may need to be slid out. Be sure to observe how they fit into the caliper bracket for correct installation of the new pads.
Step 7: Compress the Brake Caliper Piston
Before installing new brake pads, the caliper piston needs to be compressed back into the caliper to accommodate the new, thicker pads. You can do this with a C-clamp or a specialized tool, being careful not to damage the piston.
Step 8: Apply Lubricant
Apply a high-temperature lubricant to the back of the new brake pads where they contact the caliper assembly to prevent squealing.
Step 9: Install New Brake Pads
Slide the new brake pads into the caliper bracket in the same position as the old pads were fitted.
Step 10: Re-attach the Brake Caliper
Once the new pads are in place, reposition the brake caliper over the rotor and secure it with the bolts.
Step 11: Re-attach the Wheels
Put the wheels back on and hand-tighten the lug nuts.
Step 12: Lower the Car
Carefully lower the car from the jack stands using the car jack, and then tighten the lug nuts with the wrench.
Step 13: Test the Brakes
Before driving, pump the brake pedal a few times to ensure the brake pads are properly seated and the pedal feels firm. Start the car and perform a slow test drive to ensure everything is working correctly.
Dispose of the Old Brake Pads Properly
Remember to dispose of the old brake pads in an environmentally friendly way. Check with your local waste management facility for proper disposal methods.
Closing Thoughts
Changing your brake pads can save you money and improve your vehicle's safety. Plus, it's a rewarding DIY project that increases your understanding of how your car works. However, never compromise on safety—if you're unsure about any step, consult with a professional mechanic.
For all your automotive DIY needs, Universal Auto Spares has the parts and expertise to assist you in keeping your vehicle running smoothly and safely. Keep following our blog for more DIY maintenance tips and tricks to keep your car in top condition.
Remember, whether you're a seasoned mechanic or a weekend warrior, Universal Auto Spares is your co-pilot in automotive maintenance and repair.
[Note to the user: This blog post is a generic guide. The specifics can vary based on the vehicle make and model. Always refer to the vehicle's service manual for exact instructions and specifications.]


